[Comprehensive Guide] Outline View In PowerPoint
Contents
What is this unknown and brilliant Microsoft PowerPoint view I hear you cry?
It’s the PowerPoint Outline view, found in the View Ribbon in the Presentation Views group.
I’ve circled the View tab and the Outline view command below so you can see it clearly.
Do you know this view and how to use it? If not, stay right where you are! It’s quite different to Normal View in Microsoft PowerPoint. It shows you the presentation outline.

Why show you this view? The answer is, we’ve been teaching Microsoft PowerPoint for over 20 years (yes it did exist back then!) and noticed that this isn’t a well-known view despite it containing so many ways to speed up your work.
For those of you keen to learn more about PowerPoint Outline is covered in our PowerPoint Training Courses.
Let’s take a look at Outline View.
What Does Outline View Show You?
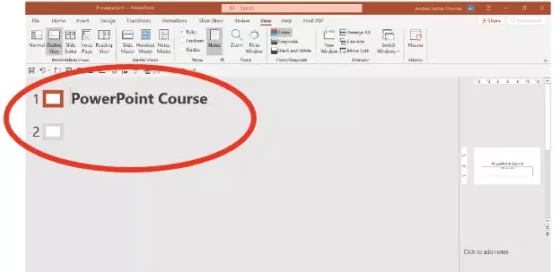
As you can see in the screenshot below, the Outline view is all about the presentation text and nothing else.
It’s where you can focus on the words in your presentation, so there are no distractions from the formatting, colour, or design.
It’s a really clean and productive view to start creating a presentation from.
The Outline view shown above has been customised slightly. I’ll show you how to recreate this exact view next.
To recreate the customised Outline view shown above, we need to make the text panel on the left sidelarger (the Outline pane) and the slide area on the right smaller.
The divider (which has been highlighted with an arrow and is shown below) is dragged to the right with the white double-headed cursor. You will see this cursor when pointing to the divider.
This creates a bigger left text panel and what’s called a slide miniature on the right.
If you are looking to learn more about how you can insert slides from other presentations easily, view our guide here!
How Do I Use PowerPoint Outline View?
Here’s how, you use the left text panel as if you were typing in Word. It’s remarkably simple to use!
The numbers and text circled above are the slide numbers and the slide titles.
Let’s create a presentation in Outline view. A new presentation has been created below and Outline view has been selected and customised as shown earlier.
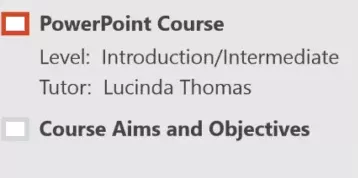
The text PowerPoint Course has been typed onto slide 1. We then press enter and move onto slide 2. This is an amazingly quick way of creating and then typing into a new slide!
We can either use this new slide 2 or press the tab key to create and type subheadings onto slide one like this shown below.
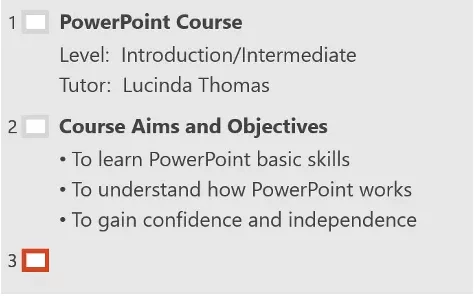
By pressing enter after the subheading Tutor: Lucinda Thomas followed by shift+tab. This changes a subheading into the main slide heading like this below and Course Aims and Objectives can be typed in.
So, to summarise, we use enter after typing text and then alternate between tab (moves text right) to produce a subheading and shift+tab (moves text left) to produce a slide heading. Its that simple to use!
Looking for something a little different? Check out our AutoCAD for architects guide here!
What other features are there in Outline view?
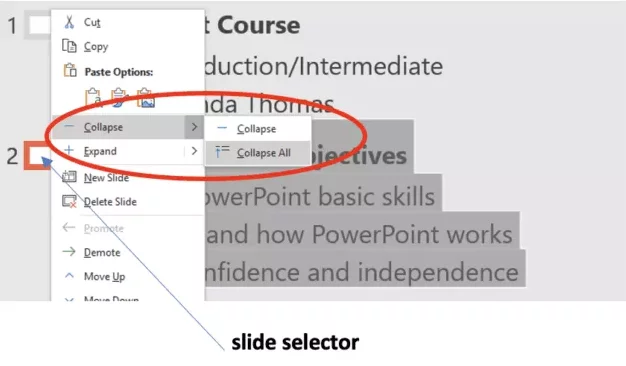
We can Collapse and Expand all or individual slides in a presentation. This is incredibly useful for managing large presentations and organising ideas too. To collapse or expand slides we need to be in Outline View and right-click on a slide selector which is the box on the right of a slide number.
As you can see below, slide 2 has been right-clicked on. The speed menu shows the Collapse and Expand options. Collapse will just affect slide 2 whereas Collapse All will affect all slides in the presentation.
When Collapse All is selected, we only see the slide headings in the entire presentation as shown below. This helps when checking the flow and logic of a presentation. To show all headings again right-click on a slide selector and select Expand or Expand All.
Reorganising slides can also be carried out in Outline view so there’s no need to change to a different view for this.
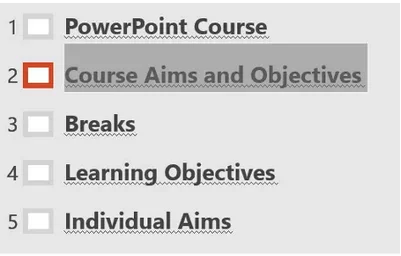
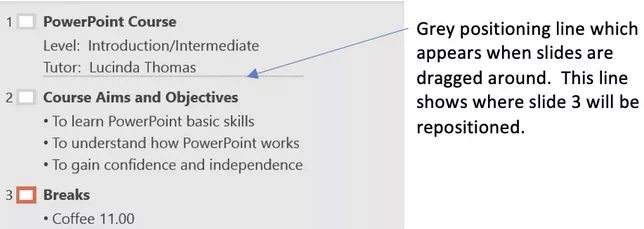
By pointing to a slide selector, a white 4 headed arrow appears. By keeping the left mouse button pressed the 4 headed arrow turns black and the slide and all its text can be dragged up or down.
The grey positioning line shows the slides new position. The picture below demonstrates slide 3 being positioned between slide 1 and 2.
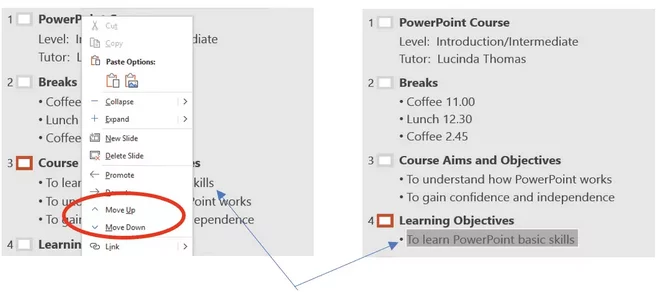
Lines of text can also be rearranged in Outline view. This is done by right clicking on the line of text and using the Move Up and Move Down options on the speed menu shown below.
The first point on slide 3 has been right-clicked on and this text has now been moved down and relocated as the first subheading on slide 4.
If you want to read information in your presentation or Outline, you can read our guide on zooming in using your mouse here.
Can I print PowerPoint Outline View?
Great news! Yes, you can print the Outline of a PowerPoint presentation. Many people use outline view to create speaker notes when making a presentation.
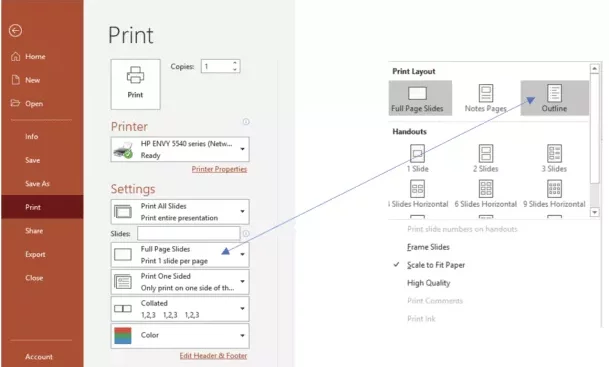
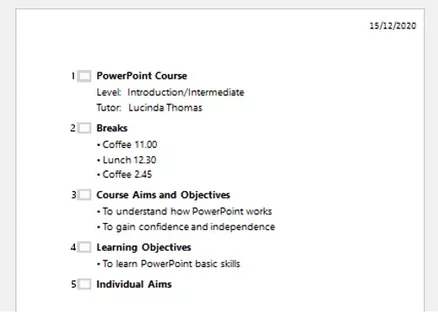
To print the Outline the Print options will be needed. Use the keyboard shortcut Control+P which takes you to Backstage View and the Print options which are shown below. The Full Page Slides option is selected, and Outline is clicked on from the menu (highlighted by the arrow) as shown below.
You are now able to print the Outline text only as shown below. This technique is covered in our comprehensive guide to all printing options in PowerPoint.
Want to see how people are using PowerPoint today? Check out our PowerPoint statistics here!
- Facebook: https://www.facebook.com/profile.php?id=100066814899655
- X (Twitter): https://twitter.com/AcuityTraining
- LinkedIn: https://www.linkedin.com/company/acuity-training/


