Adobe Fonts: Creating Your Own Glyphs
This is part 2 of a 4 part series. For the other parts see here: Part1, Part3, Part4.
As before to follow this tutorial you will require:
FontSelf Extension for Photoshop and/or Illustrator.
Creating Glyph Alternates
Open Photoshop and Create a New Document.
At the top of your screen, go to Window > Extensions > FontSelf Maker

FontSelf Maker sometimes takes a while to boot up, especially on its first time. Be Patient. Once it’s ready, the FontSelf window should look like Figure 2.

Before we can make a Glyph Alternate, we need to make a Glyph. The FontSelf extension actually makes that quite easy.
Click the Pen Tool in the Toolbar, or press P.
Once you have selected the Pen Tool, go to the Top Left corner of your window. Open the drop-down that says “Path” and change it to “Shape”
The next step is to use the Pen tool to make a generic “A” Glyph in our document.
For those of you who haven’t used the Pen Tool, it’s quite simple.
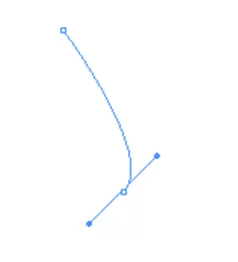
Click to add points, Press Alt and Click each point after making that point, and Click and Drag to make a curve instead of a straight line.
To make a point that’s unconnected to prior points, Hold Shift and Click.
Figure 5 is what my “A” looks like. However yours turned out is fine.
You may need to press V to leave the Pen tool.
Now, Ctrl-Click your shape, and Drag it onto the FontSelf Panel. As you do, 4 options will come up. Drag it to the bottom one, which is white in Figure 6.
Now, your FontSelf Panel will look like Figure 7. Notice the square under our “A”? Click that square, type “A”, and then hit Enter.
FontSelf takes care of Height and Base and all other sorts of Font technicalities that can usually bog down the excitement of making a font.
This extension frees us from a lot of the logistical burden normally involved in Glyph Design.
Make another “A” that looks different than the initial 1. This is how mine turned.
You’ll notice I’ve been purposefully leaving out the triangular “hole” from the top half of the “A”…. Later on in the tutorial, we’ll get to how to make those.
For now, do what we did with the previous “A”…. Ctrl-Click and drag…..
This time, when you try to replace the square with “A”, a dialogue will come up, matching the one in Figure 9. Click Alternate.
After you’ve done this, use what you’ve learned so far to create glyphs for lowercase “w”, and “m”. Make sure both of these letters bottoms align with the bottom of the document. You can use the image below as a reference.
Use a grid if you want to fine-tune your creation (In fact, that’s exactly what I would recommend if we were making a complete font, and not just a few glyphs). Do not drag the glyphs into the FontSelf Panel just yet.
You can actually drag multiple glyphs into the FontSelf Panel in one shot. The way to do this is by going to the Layers Panel and Ctrl-Clicking each Glyph layer you want to use.
If there are a lot, you may want to hold down Shift, and click the first one and then then the last one.
Both of our Photoshop courses cover working with layers if this is something that you are not aware of.
After this, follow the normal Ctrl-Click-Drag procedure for importing into the FontSelf Panel. You may get a dialogue about misaligned letters, but you shouldn’t. If you do, try to line them up and then go again.
Set our “w” glyph as a “w”, and our “m” glyph as an “m”.
Next, we will be making an “s”. S’s can be pretty tedious to make. You likely will find it easier to create the “s” in Illustrator, and import it to our Photoshop file from there.
Remember: What we create with the Pen Tool is not set in stone, rather, it can be edited and modified afterwards.
After your satisfied with your “s”, add it to the FontSelf Panel, and assign it.
We’ll now make an “o”. Remember how I said we would get into making “holes” for certain letters? Well, let’s get started. Right-Click on the Shape Tool in the Toolbar and choose the “Ellipse Tool”.
Shift-Click anywhere on the document and drag to make a circle (Don’t let go of the Shift key until afterwards).
After you’ve created that circle, Create a New Layer and make a slightly smaller circle. Select both these layers in the Layers Panel, and then Press V.
Now click the 2 items circled in Figure 12. This will align and centre the smaller circle within the larger one.
Now with both Shape Layers still selected, Navigate to Layer > Combine Shapes > Subtract Front Shape.
If done correctly, you will see a beautiful, symmetrical “o”. The basic premise is that you use one shape to create a hole in another. If you want to create alternates of this “o”, you can do so quite easily… just duplicate a few times, and have some instances of the “o” stretched this way or that.
After the “o”, make an “e”, using the same process we used to make the “o”. In fact, you can probably start off with the Ellipse Tool again.
If you want to redo your “A’s” with the triangular holes feel free.
Once you are satisfied with what you have, click “Save” in the FontSelf Panel, name the font “Tutorial”, and save the font in your Documents folder.
The font still isn’t installed. Go to your Documents folder and double-click the .otf file we’ve created. Then, in the Windows Font Viewer Window that comes up, click Install to install the font.
Go back to Photoshop, type T to open up the Type Tool, click the Font Dropdown and find our font, which we named “Tutorial”.
Once you’ve selected our font, you can type the word “Awesome”, and the glyphs we created should show up. Even better, when we highlight our “A”, you will see an option for the Alternate which we made.
There are endless possibilities when it comes to Glyph Alternates. You can create Color Alternates and Contextual Alternates.
FontSelf currently only supports one main kind of Alternates, and that limits coding, but we will delve into programming Glyph Alternates in a later tutorial.
FAQ:
Here we will go over a number of commonly asked questions about Adobe Fonts and Glyphs.
Editing Pre-existing Fonts
You can only edit fonts on FontSelf that were made with FontSelf.
Using Brush Tool instead of Pen Tool.
Using FontSelf, you can use the Brush Tool or the Pen Tool to create glyphs, but not both in the same font.
This is preferable when going for a “handwritten” feel. Brush tool and Pen tool are covered during Adobe Photoshop for beginners course which runs in Guildford and London.
I don’t like a glyph I made.
That’s fine. Create a new one. When you try to assign the letter to that glyph, you can choose the “Replace” option and it will get rid of the old one.
Why is the font created in the tutorial not so nice-looking?
The purpose of this tutorial is to teach function, not aesthetic. This tutorial gets you familiarized with using FontSelf, particularly in conjunction with the Adobe Programs it is attached to.
Additionally, font glyphs are one of those things that get better the more hours you put in to them.
Creating a font is a very, very, technical (and nuanced) art. Thee aesthetical process behind making a font could have, and has, filled several textbooks.
When I “Ctrl-Click” and try to drag a shape to make it a glyph, it just stretches the shape.
In this instance try pressing V and then maybe Esc a few times before attempting to drag again. If you still have issue, Shift-Click instead.
Notes:
–FontSelf costs $50 for Normal users and $25 for Students and Teachers. The reason I have chosen it in lieu of Freewares such as FontForge, or more complex programs such as FontCreator, is because FontSelf is the simplest option for creating Glyph Alternates and very good value.
-If you want to use an alternative to FontSelf feel free. Birdfont is great.
If you’ve ever tried to make alternates to glyphs in a font before, or even just tried to make a font, you’ll quickly find there are no good shortcuts and that font design is a particular area of expertise.
Continue on to Part 3 of our guide here!


